Article Body
What Is an Optical Microscope?
An optical microscopes also called a light microscope, uses visible light and glass lenses to magnify small specimens. Light passes through or reflects off the sample, and a lens system enlarges the image for your eye or a camera. Most models reach roughly 40x to 1,000x.
It is the most common type of optical microscopes and it is often called a biological microscope. That name comes from its long use in studying microorganisms and plant and animal cells.
Unlike an electron optical microscopes it works at room conditions with little specimen preparation. It can also show living specimens, which is why it remains the default tool in classrooms, clinics, and many industrial labs.
A short history
In the 17th century, Antonie van Leeuwenhoek built single-lens optical microscopes and observed microorganisms. Around the same time, Robert Hooke used a two-lens compound design to examine cork. The box-like structures he saw looked like small rooms, so he called them cells.
Later, Ernst Abbe’s work on diffraction explained why optical microscopes resolution has a physical limit. Carl Zeiss’s workshop turned that theory into precision instruments.
How an Optical Microscope Works?
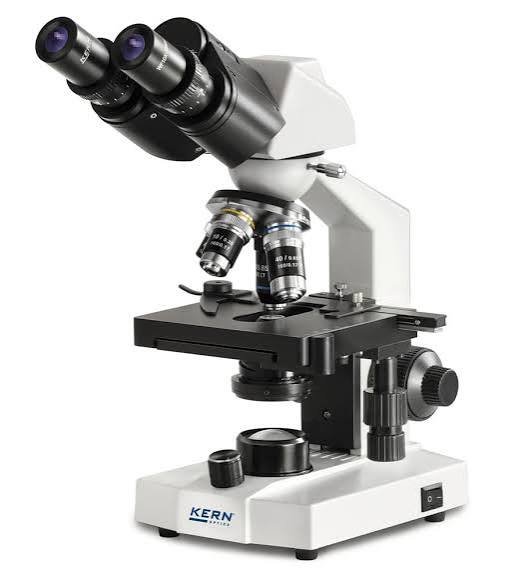
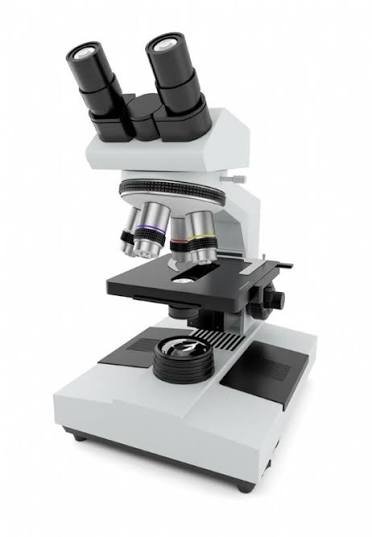
Most modern optical microscopes are compound optical microscopes. They magnify in two stages. The objective lens, close to the specimen, forms a first magnified image. The eyepiece (ocular lens) then enlarges that image again.
In a standard biological optical microscope, the light source sits below the stage. Light travels up through the specimen, which is why samples must be thin enough to transmit light.
The parts that matter
- Illuminator: an LED or halogen lamp, or a mirror in very basic models.
- Condenser and iris diaphragm: focus the light and control contrast.
- Stage: holds the slide, ideally a mechanical stage with X-Y controls.
- Objective lenses: usually 4x, 10x, 40x, and 100x on a rotating nosepiece.
- Eyepiece: commonly 10x.
- Coarse and fine focus knobs: bring the image into sharp view.
The magnification formula
Total magnification equals the objective power multiplied by the eyepiece power. A 40x objective with a 10x eyepiece gives 400x.
Objectives are usually parfocal, so the image stays roughly in focus when you switch between them. That is why you can move from low to high power with only a small adjustment.
Magnification vs Resolution:
What You’ll Actually See?
Magnification makes an image larger. Resolution decides whether two nearby points look separate or blur into one. Resolution is what determines how much detail you see.
Resolution depends on the wavelength of light and the objective’s numerical aperture (NA). A higher NA gathers more light and resolves finer detail.
For visible light, the practical limit for conventional optical microscopes is about 200 to 300 nanometres sideways. Depth resolution is coarser. This is the Abbe diffraction limit.
Why “2000x” on a box can mislead?
Some lab-grade instruments can reach about 2,000x with oil immersion. Many budget scopes advertise huge numbers that their optical microscopes cannot support. Past the limit of resolution, you get a bigger but blurrier image, known as empty magnification.
For most schools and hobbyists, 400x is enough. Fine detail on bacteria calls for 1,000x with an oil-immersion objective. A better NA and objective quality will do more for you than a larger number on the box.
What you can and can’t see?
| Subject | Visible with an optical microscope? |
| Plant and animal cells, pond organisms, blood cells | Yes |
| Bacteria | Yes, at high power, often stained |
| Most viruses | No, they fall at or below the limit |
| DNA strands, proteins, atoms | No |
Super-resolution fluorescence methods such as STED and single-molecule localization now push past the traditional limit. They earned the 2014 Nobel Prize in Chemistry for Eric Betzig, Stefan Hell, and W. E. Moerner. They need specialised fluorescence instruments, not a standard optical microscopes.
Types of Optical Microscopes
| Type | Best for | Typical magnification | Image |
| Compound (brightfield) | Cells, bacteria, tissue slides | ~40x–1,000x | 2D, transmitted light |
| Stereo (dissecting) | Insects, coins, circuit boards, minerals | ~10x–50x, sometimes to ~100x | 3D, reflected light |
| Digital | Sharing, documentation, quick inspection | Varies | Screen or camera |
| Inverted | Living cells in culture dishes | Varies | Objectives sit below the stage |
| Metallurgical | Metal and opaque industrial surfaces | Varies | Reflected light |
| Polarizing | Minerals, crystals, fibres | Varies | Shows birefringence |
| Fluorescence | Labeled molecules and structures | Varies | Needs filters and special dyes |
Compound microscopes
These are the classic choice for anything thin or translucent, such as blood smears, cheek cells, pollen, or protozoa in pond water. Samples usually need mounting on a slide and sometimes staining.
Stereo microscopes
A stereo optical microscopes gives each eye a slightly different view, producing a 3D image with a long working distance. It suits dissection, electronics repair, insect study, and gem or coin inspection.
Digital microscopes
These use a camera and sensor to display the image on a screen. They come as handheld, USB, and LCD models. They are convenient for teaching and documentation, though a traditional optical microscopes instrument usually gives better image quality at a similar price.
Inverted microscopes
Here the objectives sit under the stage. Cell biologists use them to watch living cultures in flasks and dishes without disturbing them.
Illumination and Contrast Techniques
Many specimens are nearly transparent, so contrast technique matters as much as the lens.
- Brightfield: the default. Best with stained samples.
- Darkfield: makes small particles glow against a dark background. Useful for environmental samples such as water and soil.
- Phase contrast: reveals transparent living cells without staining.
- Differential interference contrast (DIC): adds a relief-like 3D look to unstained samples.
- Polarized light: highlights crystals and fibres.
- Fluorescence: shows labeled structures with specific dyes.
Good microscopists also use Köhler illumination, a setup procedure that gives even, high-contrast lighting. It is a major reason lab microscopes outperform casual ones.
Which Type Fits?
Three Ways to Decide
1. Choose by specimen
- Thin, translucent, or on a slide → compound.
- Solid, opaque, or three-dimensional → stereo.
- Living cells in dishes → inverted.
- Metal, wafers, or other opaque flat surfaces → metallurgical.
- Crystals or mineral thin sections → polarizing.
2. Choose by budget
Start with the most capable instrument in the correct category. A well-built compound scope beats a stereo scope bought “because it is cheaper” if your samples are on slides.
3. Choose by profession or use
| Buyer | Sensible starting point |
| School student or homeschool family | LED compound, binocular if used often |
| Child under about 9 | Stereo or handheld digital, which give immediate engagement |
| Biology or nursing college student | Binocular compound with a 100x oil objective |
| Electronics repair | Stereo on a boom or pillar stand |
| Collector (coins, stamps, gems) | Stereo, or a digital scope |
| Clinical or research lab | Binocular or trinocular compound with plan objectives |
| Cell culture lab | Inverted, often with phase contrast |
| Semiconductor or metals inspection | Metallurgical microscope |
What to Look for Before You Buy?
Head type:
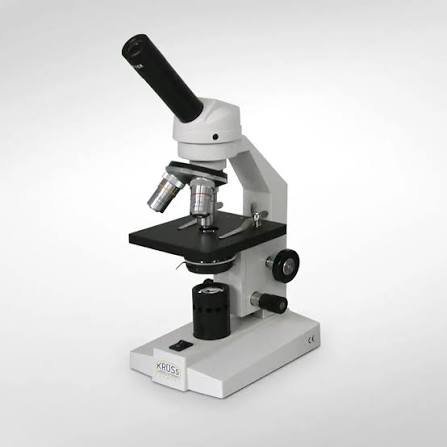
- Monocular: cheapest, fine for casual use.
- Binocular: more comfortable and better for long sessions.
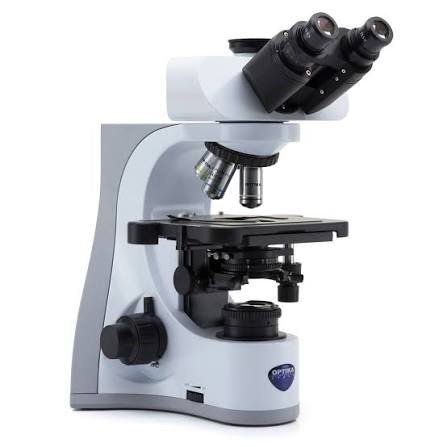
- Trinocular: adds a third port for a camera.
Objectives: Achromatic objectives are common and affordable, with some colour fringing. Plan objectives give a flatter field. Higher-correction apochromatic optical microscopes cost far more and matter mainly in research work.
Numerical aperture: compare NA between models, not just magnification.
Condenser: look for an Abbe condenser with an iris diaphragm, which allows much better contrast control.
Stage: a mechanical stage makes moving slides at high power far easier.
Illumination: LED runs cool and lasts long. Halogen is bright and warm but generates heat.
Frame: metal frames hold alignment better than plastic.
Warranty and support: check replacement-part availability and return terms. Unknown brands can leave you stuck if something fails.
Pricing Guide
These are rough US-dollar ranges. Prices vary by brand, market, and season, so check current listings before buying.
| Category | Approximate range (USD) |
| Toy or children’s microscope | ~$20–$70 |
| Student compound | ~$100–$300 |
| Advanced hobby or college compound | ~$300–$1,000 |
| Stereo microscope | ~$100–$1,000+ |
| Digital microscope | ~$50–$500 |
| Professional lab compound | ~$1,000–$5,000+ |
| Research inverted or fluorescence | ~$10,000 and up |
Well-known consumer brands include AmScope, Swift, OMAX, Celestron, Carson, and Motic. Professional lines come from Olympus (now Evident), Nikon, Zeiss, and Leica.
New vs used
Advice varies. Some reviewers steer first-time buyers away from secondhand optical microscopes because a hidden fault is hard to diagnose. Refurbishers, on the other hand, sell serviced units with warranties, and older professional instruments can outperform new budget models.
A practical approach:
- Buy new if you are a beginner and want a warranty and easy returns.
- Buy refurbished from a reputable dealer if you know what you need and want better optical microscopes per dollar.
- Avoid untested private sales unless someone experienced can inspect the lenses, focus mechanism, and alignment.
How to Use a Compound Microscope?
- Place the microscope on a stable surface.
- Rotate to the lowest-power objective (usually 4x).
- Secure the slide in the stage clips.
- Turn on the light and adjust the diaphragm.
- Use the coarse focus to find the specimen.
- Sharpen with the fine focus knob.
- Move to 10x, then 40x, using only fine focus at higher power.
- For 100x, add one drop of immersion oil and focus carefully.
- When finished, return to the lowest objective and lower the stage.
- Clean any oil off the 100x objective.
Common Mistakes and Care
- Buying by advertised magnification. Check optical quality and NA instead.
- Using coarse focus at high power. This can crash the objective into the slide.
- Starting at high power. You will lose the specimen quickly.
- Touching lenses with fingers or tissue. Use lens paper.
- Thick or dry samples. Poor slide preparation ruins good optics.
- Leaving oil on the objective. It attracts dust and can damage the lens.
Care checklist:
- Cover the microscope after use.
- Carry it with two hands, one on the arm and one under the base.
- Turn the light down before switching off.
- Store in a dry place to prevent fungus growing on lenses.
- Service heavily used instruments periodically.
Safety:
Never aim a microscope or any magnifying optical microscopes at the sun. If you use fluorescence with UV or mercury sources, follow eye-safety guidance.
For Labs and Industry
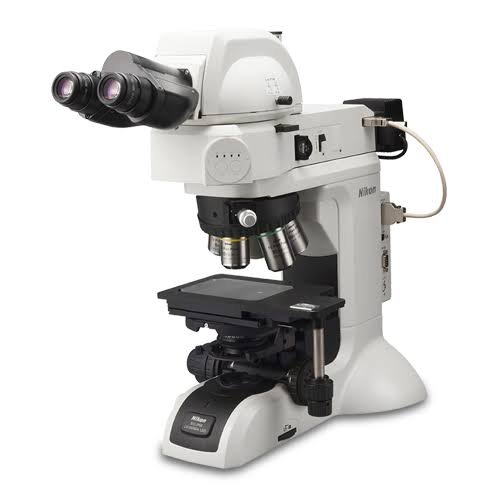
Businesses buy optical microscopes for inspection, quality control, and failure analysis. In semiconductor work, most specimens are opaque, so labs use metallurgical optical microscopes with reflected light.
When evaluating instruments or vendors?
ask:
- Does the objective range suit our specimens?
- Is the system upgradeable, for instance with a camera or a motorized stage?
- Can we calibrate it with a stage micrometer or calibration slide?
- What are the service response times and part availability?
- Is training included?
Calibration matters because measurements are only trustworthy if the scale is verified regularly.
Buying Across Borders
If you buy internationally:
- Check voltage and plug compatibility on the illuminator.
- Confirm metric units on stage scales and documentation.
- Compare shipping, import duties, and warranty coverage in your country.
- Education and government buyers may need to go through approved distributors or tenders.
Alternatives to Optical Microscopes
| Alternative | When it makes sense |
| Electron microscope (SEM/TEM) | Nanometre-scale detail, at high cost and with prepared samples |
| Confocal microscope | Optical sections of thick fluorescent samples |
| Atomic force microscope | Surface topography at very small scales |
| Digital USB microscope | Casual inspection and screen sharing |
| Loupe or magnifying glass | Simple low-power viewing |
FAQs
1. What is an optical microscopes used for?
It magnifies small specimens such as cells, microorganisms, tissues, minerals, and small components. Schools, hospitals, research labs, and manufacturers all use it.
2. How much can an optical microscopes magnify?
Most reach about 40x to 1,000x. Some lab-grade oil-immersion systems go higher, but the useful limit is set by resolution, not by the magnification number.
3. What is the difference between magnification and resolution?
Magnification makes the image bigger. Resolution decides whether two close points look separate. Beyond the resolution limit, extra magnification just makes a blurrier picture.
4. Can an optical microscopes see bacteria or viruses?
It can show bacteria, usually at 400x to 1,000x, often stained and with oil immersion. Most viruses are too small for conventional optical microscopy.
5. Can you see DNA with an optical microscopes?
No. Individual DNA molecules are far below the resolution limit, though stained cell nuclei are visible.
6. Do I need oil immersion?
Only if you need the finest detail at 100x, such as when examining bacteria. For general school or hobby viewing at up to 400x, you usually don’t.
7. Are toy microscopes worth buying?
Some spark curiosity, but many use plastic optics and give blurry, dim images. A basic real compound microscope is usually a better investment.
8. Is a digital microscope better than an optical one?
It is easier for sharing, capturing images, and quick inspection. For image quality at the same price, a traditional optical microscope generally does better.
9. What is the difference between optical and electron microscopes?
Optical microscopes use visible light and glass lenses and can observe living specimens. Electron microscopes use electron beams to reach far higher resolution, but they cost much more and need specially prepared samples.
10. How often should a microscope be calibrated?
It depends on use. For measurement work, calibrate against a stage micrometer at set intervals and whenever you change objectives or cameras.
Conclusion
An optical microscope is the most accessible way to see the small world, and the right one depends on what you plan to look at. Thin slides call for a compound optical microscopes, solid objects for a stereo, and living cultures for an inverted model.
Focus on optical quality, numerical aperture, and build rather than the biggest number on the box. Then match the head type, illumination, and camera options to how you will actually use it.
These information about Projector Rental are gathered from different surveys, medical tests and tech giants like Techradar and more. Our top priority is to provide you valuable information.
For More Details About Different Projectors Click Here