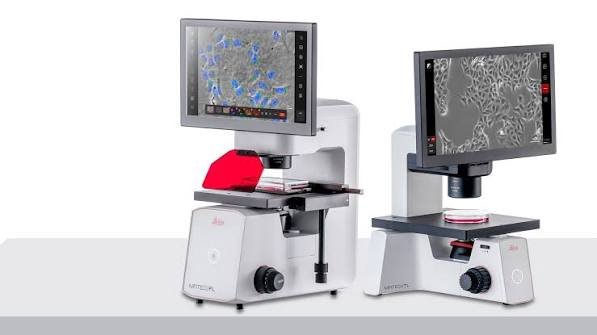
Compound microscopes can be described as one of the widely used scientific instruments in the world, but a lot of people only use it in the laboratory at a school, and aren’t aware of what it is different from other magnifying tools.This gap is important, as making the wrong choice or not using the right microscope is among the most frequently made — and preventable mistakes that beginners make.
This guide will explain the specifics of the concept of a compound microscope, what it does working, how it operates and what it’s components do and how to select the best one for your particular situation in an educational setting, a lab or even a hobby at the kitchen table.
What Is a Compound Microscope?
The compound microscope is called an optical tool that utilizes multiple lenses, one lens located close to the specimen as well as the eyesight (ocular) lens, which is situated near the eyes of the viewer to magnify small transparent objects. The word “compound” is used to refer to “compound” because it combines the magnifying power of multiple lenses rather than relying on just one lens.
This differentiates it from a basic microscope as a simple magnifying glass that has only one lens and provides significantly smaller the power of magnifying. The compound microscope can be described as the most common instrument to view anything light can penetrate: cells and bacteria, blood smears as well as tissue section.
Most compound microscopes achieve an overall magnification of between 40x to 1000x, with some special setups push a bit higher. This range covers the majority of clinical, educational as well as hobbyist demands.
How a Compound Microscope Works?
- The mechanisms are much simpler than they sound, despite the optics are highly exact.
- Light passes through the specimen. A built-in LED or halogen lamp — or, on older models, a mirror illuminates the sample from below.
- The objective lens forms the first magnified image. This lens sits closest to the specimen and does the initial magnifying work.
- The eyepiece lens magnifies that image again. This second stage is why the microscope is “compound” you’re seeing a magnified image of an already-magnified image.
- The two magnification levels multiply together Combining a 40x objective with a 10x eyepiece results in an overall magnification of 400x.
- The two-stage design makes compound microscopes able to achieve these high magnification levels when as compared to single lens tools.
- The trade-off is a narrower field of view and a shallow depth of field, which is why specimens need to be thin and properly mounted on a slide rather than viewed as whole, bulky objects.
A Quick Note on Kohler Illuminatio
Compound Microscope Parts and What They Do?
Each compound microscope, no matter the price, is constructed around the same fundamental components.
| Part | Function |
| Eyepiece (ocular lens) – the lens you look through; typically 10x magnification Stage clips | Hold the slide steady in place |
| Coarse focus knob | Makes large adjustments to bring the specimen into general view |
| Fine focus knob | Makes small adjustments for sharp, precise detail |
| Condenser | Focuses the light onto the specimen |
| Diaphragm (iris) | Controls how much light reaches the specimen |
| Light source | An LED bulb, halogen bulb, or mirror |
| Arm and base | The structural frame and the point you use to carry the instrument |
Understanding the function of each component isn’t merely a matter of knowledge and directly impacts the way you concentrate and the amount of detail you are able to observe. An unbalanced diaphragm for instance is one of the most frequent reasons for beginners to experience a blurred or dark image, even if their focus is technically correct.
Magnification is different from Resolution: The Distinction Most Guides Skip
This is something that a lot of purchasers don’t understand: Magnification numbers alone won’t reveal how effective an instrument actually is.
Magnification is simply how large an image looks. Resolution is the microscope’s capability to display two close points in a way that is truly distinct Resolution is the thing that determines if an image appears sharp or blurry.
Resolving power in a microscope is mostly from the aperture of its numerical, which is a measurement of how well a lens captures and concentrates light. A microscope that is advertised as 1000x magnification however constructed with poor optics can result in a blurrier image than a high-quality 400x scope. This phenomenon even has an official name in optics: Empty magnification. in which you’re expanding an image far beyond the point at which any new details are being visible.
The practical takeaway: don’t shop by magnification number alone. Lens quality — whether it’s a basic achromatic lens or a sharper, flat-field plan achromatic lens — matters more than the number printed on the box.
Types of Microscopes Compared
Compound microscopes aren’t the only option, and knowing where they fit among the alternatives makes the buying decision much easier.Type Magnification Range Ideal for Specimen Prep
Compound (light) microscope 40x-1000x, ideal for cells, bacteria and tissue slides thin slides usually stained; stereo dissecting microscope 10x-40x is used on insects, rocks, circuit boards or dissection with minimal to no effects from dissection or insects.
Digital microscope: Screen viewing, teaching and documentation (roughly 10x-1000x) Varies Confocal/fluorescence microscope with special optics Up to 1000x for 3D cell imaging and fluorescent tagging Fluorescently labeled.Electron Microscope (SEM/TEM) at 1,000,000x Viruses, molecular structures and nanomaterials that have been vacuum-coated; vacuum compatible; often coated on simple microscope 2x-20x for quick field checks.
If your subject is thin, flat, and translucent — think onion skin cells or a blood smear — a compound microscope is the correct tool. If you’re looking at something whole and opaque, like a beetle or a coin, a stereo microscope will actually serve you better, since compound microscopes aren’t designed for 3D, solid objects.
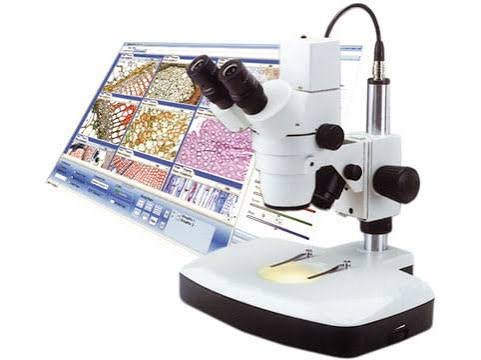
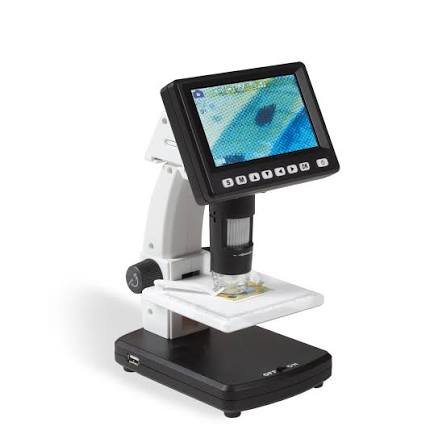
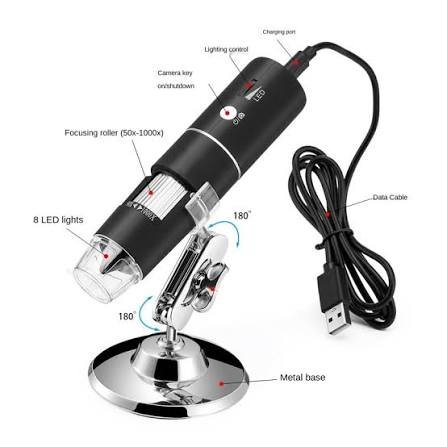
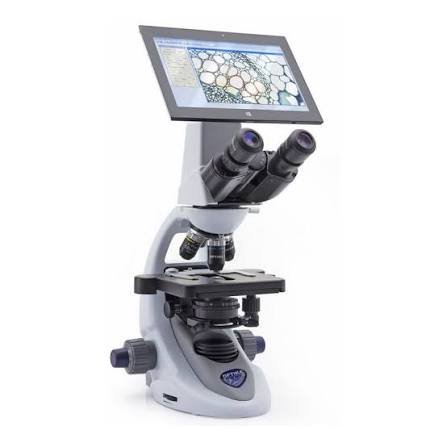
Digital microscopes are worth a mention too, since they’re increasingly popular for classrooms and content creation. They display the image on a screen instead of through an eyepiece, which is great for group viewing, but at a comparable price point they generally can’t match the optical resolution of a well-built compound microscope.
Who Actually Uses Compound Microscopes?
Compound microscopes show up across a surprisingly wide range of settings:
- Students, from middle school through university, in biology and microbiology labs
- Medical and clinical lab technicians, examining blood smears, urine samples, and Pap smears
- Histologists as well as Pathologists looking at tissue sections
- Microbiologists and researchers who investigate protozoa and bacteria and cultured cells
- Clinics for veterinary medicine Then, you can run fecal tests and scrapings of the skin
- Water quality analysts, identifying organisms in pond or lake samples
- Hobbyists, exploring pond life, plant cells, or home microbiology for fun
The instrument’s roots go back centuries — early pioneers like Antonie van Leeuwenhoek and Robert Hooke, working with rudimentary lens designs credited in part to Zacharias Janssen, laid the groundwork for the microscopy that clinics and classrooms rely on today. It’s not just a matter of humour and it’s a reminder that the fundamental principle of optical optics that two lenses work together hasn’t changed fundamentally over hundreds of years even as the materials and precision have risen dramatically.
How to Choose the Right Compouand Microscope?
A purchase of a microscope is easier after you break it down into the use the case
Step 1: Define your primary use.
- School or homeschool → durable, simple, LED-lit, 40x–400x range is usually plenty
- Clinical or diagnostic work → higher-grade optics, 1000x with oil immersion, binocular head
- Hobbyist or nature study → moderate magnification, optional digital camera attachment
- Professional research → trinocular head for camera documentation, plan achromatic lenses, mechanical stage
Step 2: Decide on a head type.
Monocular (one eyepiece): Cheap and straightforward but it may cause eye fatigue over extended sessions Binocular (two eyepieces) is more suitable for long-term use as it provides comfort in terms of comfort and sight clarity.. Cost higher
Trinocular (two eyepieces plus camera port) Enables photo and video documentation.Most expensive option
The 3rd step:
Verify the lens’s grade. Achromatic lenses are the standard for budget lenses and are well for everyday use. Make sure that the lenses you choose are achromatic to allow to a wider field of view, and are worth the investment for professional or clinical use where sharpness from edge to edge is crucial.
Step 4.
Find the appropriate magnification range for your specimen. Most users never actually need beyond 400x. The 1000x range with oil immersion is really only necessary for viewing bacteria in fine detail.
Step 5:
Set a realistic budget using the pricing guide below, and don’t assume the most expensive option is automatically the right one for your use case.
Weighing the Decision
The advantages of a compound microscope vital for viewing cellular detail, readily accessible at any price and a common tool in medical and education settings, and easily scalable from beginning to professional.
There are trade-offs worth being aware of is that it only works you use small, prepared specimens The field of view when compared with stereo-type microscopes, and the higher end models are expensive rapidly, while the lenses must be cleaned regularly and calibration so that they stay precise.What a Compound Microscope Costs?
Pricing varies significantly by build quality, lens grade, and features, and figures below reflect general market ranges rather than a specific retailer’s current pricing — always check with a supplier directly for up-to-date numbers.
| Tier | Typical Price Range | Suited For |
| Entry-level / toy-grade | $30–$80 | Basic exploration, young children |
| Student-grade | $80–$300 | Middle school through college coursework |
| Semi-professional | $300–$800 | College labs, serious hobbyists |
| Professional and professional | $800-$3,000 | Diagnostic laboratories Research institutions, clinical labs |
Some of the most well-known companies in this area include brands like AmScope, Olympus, Zeiss, Leica, Nikon, and Celestron covering the entire spectrum from clinical grade to student-grade equipment.Brand reputation matters most at the higher end, where optical precision and long-term durability become the deciding factor rather than price alone.
When comparing providers you should look at the different kinds of suppliers that include scientific and educational suppliers, medical or laboratory equipment suppliers and general marketplaces online for basic models, as well as specialty optics dealers if you’re in the market for trinocular photography equipment. The prices and availability vary based upon the location and costs for imports and so looking at three or more sources prior to making a decision is usually worth an extra couple of minutes particularly for purchases that are clinical grade, in which after-sales calibration and repair service is important.
How to Use a Compound Microscope?
The ability to create a sharp and usable image is a matter of doing the right steps instead of jumping right towards higher magnification.
1. The microscope should be placed on a flat, stable area near to a source of power when it’s lit by LED.
2. Begin with the lowest power objective lens. It is typically 4x then rotated to its current position.
3. Put your slide ready onto the stage and fix it using clips for the stage.
4. Set the diaphragm at an appropriate light level.
5. Utilize the coarse focus knob as you look through the lens until the object appears to be in view.
6. Adjust the Fine Focus Knob to increase image sharpness.
7. The magnification will gradually increase from 10x to 40x and then 100x.Refocus using the precise adjustment with every step.
8. To make 100x oil immersion add a drop of immersion oil onto the slide, before turning the 100x object to make close contact.
9. Clean the lens before sliding it following that, using only the lens paper and not using a tissue or cloth.
10. Common Mistakes and Care Tips Certain habits distinguish instruments which will last decades from ones which will only last months or weeks.
Avoiding these mistakes:
Using the coarse focus knob at high magnification, which can crack slides or scratch lenses
- Skipping the low-power objective and jumping straight to high power
- Cleaning lenses with regular tissue or cloth instead of proper lens paper
- Leave the microscope unattended and allowing dust to be able to settle on the optics * Not noticing the condenser or diaphragm. This results in low contrast and washed-out photos.
A simple care checklist:
- Cover the microscope with a dust cover after every use
- Clean lenses only with lens paper and an approved lens cleaner
- Store it upright in a stable, low-humidity spot
- Carry it with two hands — one on the arm, one supporting the base
- Have professional-grade microscopes calibrated periodically
One warning worth repeating: immersion oil left on an objective lens that isn’t rated for it will damage the lens coating over time. Only apply oil to the designated 100x oil-immersion objective, and clean it off promptly after use. For anyone working with biological specimens in a clinical or lab setting, it’s also worth following basic safety handling practices for stained slides and proper disposal procedures consistent with your lab’s standards.
Compound Microscope and the alternatives.
With an stereo microscope: pick stereo for all-transparent 3D objects, such as circuit boards or insects; select compound for thin, transparent samples that are viewed by passing light through them.
A digital microscope. Digital microscopes can be useful for group instruction and a simple way to record your notes on a display, but they generally have less resolution than a similar-priced compound microscope.
Contrasting with electron microscopes, which go far beyond compound microscopes and can capture molecules and viruses more precisely than their counterparts, electron microscopes cannot research living organisms due to lab costs and are generally limited in their applications.
Frequently Ask Question
1. What are the key differences between these two types of microscopes?
Microscope is the most broad term which refers to the whole variety of magnifying instruments.. Compound microscopes are one type which utilizes two or more lenses and eyepiece that increases the magnifying power of a lens instrument, for example, the magnifying glass.
2. What is the highest magnification that can be achieved with a typical compound microscope?
The majority of compound microscopes are between 40x to 1000x magnification total depending on the eyepiece and objective combo is being used.
3. What exactly is”compound?
It’s described as “compound” because it combines the magnifying power of several lenses, usually an objective lens as well as an eyepiece lens instead of relying on one lens in as a normal magnifying glass would.
4. Are you able to observe bacteria with the help of a compound microscope?
Yes. The majority of bacteria are visible when magnified by 400x to 1000x The clearest image usually requires immersion in oil at 1000x.
5. Do you have the ability to see viruses using a an optical compound microscope?
No. They are too small for light microscopy, even with the maximum magnification for compound microscopes. The ability to view viruses requires the use of an electron microscope.
6. What is the distinction between a compound and stereo microscope?
The compound microscope magnifies small flat specimens with high intensity by passing light through the specimen. Stereo microscopes view complete 3D objects that are opaque at lower magnifications using reflection light.
7. What is the price of a quality compound microscope set you back?
Students-grade models usually cost between around $80-$300. Semi-professional and medical-grade lenses vary from around $300 to $3,000 or more dependent on the lens’s quality and features, such as trinocular heads.
8. What is the best way to clean your compound microscope?
Use only lens papers and a certified cleaning solution for your lens Never use a cloth or paper towel tissue that could scratch the coating of the lens.
9. What’s the purpose that the objective lens serves?
The objective lens is the close to the specimen and creates the initial stage of magnification. It is further magnified by the eyepiece, forming an image.
Final Thoughts
A compound microscope has earned its status as one of the science’s most reliable tools since the principle behind it — the combination of two lenses to provide an unimaginable world for the human eyeit still performs better than most other instruments in its price. When you’re planning to outfit an educational space, supplying an experimental lab or even acquiring your first hobby, the key choice isn’t about what brand to choose but it’s about matching the microscope’s magnifying power or lens’s quality and head shape to the actual objects you’ll be viewing.
First, identify the primary purpose for which you are using it and then decide on the amount you value the comfort of your surroundings and features for documentation, such as trinocular and binocular heads do not allow a large magnification figure on the box replace the ability to check the quality of your lens. Learn the basics and master the low-to-high practice of focusing early and a properly-chosen compound microscope will last for a long time.
These information about Projector Mount are gathered from different surveys, medical tests and tech giants like Techradar and more. Our top priority is to provide you valuable information.
For More Details About Different Projectors Click Here